Because life’s celebrations shouldn’t cost the Earth

Showing posts with label Halloween. Show all posts

Monday, 31 October 2022

Happy Halloween Garland
Upcycled Bedding Bunting!


Halloween seems to be becoming a bigger event each year in the UK but most of the decorations are either imported, plastic or both. I wanted to create some that are kinder to our planet and was therefore delighted to source a 'well-used' duvet cover costing just 50p! 

I forgot to take any photos before I attacked it with my scissors, so 'borrowed' this image of an unopened set from the internet!  The pillowcases were missing from my set but the sugar skulls on those would have been rather too big for bunting anyway! 


I was able to cut 80 pennants/flags from the duvet cover, not such bad value for 50p!  The bells were from a thrifted wire Christmas decoration which, after taking apart with pilers, yielded enough bells for many, many more projects to come - The 70 I used here didn't even seem to make a dent in the stash!


In the bottom of my bead tin were these tiny skulls from a batch I picked up at a car boot sale years ago.  They're not really my thing and I wasn't expecting to find a use for them but they worked out pretty well on this project! 


Halloween wouldn't be Halloween without cats, so here's the gorgeous Luna 'helping' me with my stitching!


The sugar skull duvet cover was originally from George at Asda and they stock lots of lovely seasonal designs. I was also excited to find this used set featuring the most adorably kitsch Christmas Kittens!

Once I've finishing stitching it into some upcycled Christmas items, I'll post some more photos and perhaps even a tutorial or two!  It really is gratifying to take an item which at first appears 'worn out' and then find lots of salvageable areas to cut out and stitch, creating new items for many more years to come.


Friday, 7 November 2014

'Reloved Magazine' Halloween Feature

DIY Gothic Cloche Article - Better late than never!


Wow, time has really flown by and it's hard to believe that Halloween was only this time last week!  There were so many pictures I wanted to take and share, but just didn't manage.  I even forgot to blog this Reloved Magazine article featuring my 'Gothic Bell Jar Tutorial'.


It looked lovely in print, although the bloodstained and rusty saw was a somewhat macabre touch on the editor's part!


I am now more than happy to start turning my thoughts to Christmas projects, only seven weeks to go!


Tuesday, 4 November 2014

Halloween Dinner Party

All Hallow's Eve 2014

I fully intended to take some more pictures of our Victorian Gothic Halloween decorations but, as usual, once the school holidays started time just seemed to slip away.....  

I can now only share a couple of snaps, which I took before the holidays began.  I had sourced some vintage glass fronted cabinets and filled them with lots of little jars labelled to look like specimen jars and medicine bottles, really rocking the spooky apothecary cabinet look!  The examples below are simply glass spice jars filled with plastic toys.  I created the labels using two lovely free fonts 'Jane Austen' and 'Old Newspaper', then printed them off onto yellow paper before further ageing them with scrapbook chalks.


Believe it or not, I'm not actually a fan of Halloween.  I worry that children rushing 'round houses in the dark asking for sweets might scare older folks and the thought of devils really leaves me cold, so Mr Larkin was sent out with the children earlier on in the day delivering sweets to the neighbours and checking that they then didn't mind us knocking on their doors later that night to collect them all back in!

As I'm not keen on the 'darker' side of Halloween, 'Victorian Gothic' seemed a perfect compromise, particularly as the children study the genre in their English Literature lessons at school.  

A skull ashtray was another cheap car boot sale find and a perfect fit for the theme, a satin top hat slung on 'his' head and sat atop a pile of suitably vintage books. You can see him in position on our mantel here.


The dress code was period costume or black tie and everyone looked absolutely perfect, but I even forgot to take any pictures at the party itself. Luckily some of the guests had managed a couple of snaps, so I can show you a selection of the super outfits.


The children sat at one end of the table and looked beautiful dining by candle light.  They have grown up together since tiny babies, attending both the same church and school. Their ages range by five years but they all get on so well and it's always wonderful to have an opportunity to reflect upon what mature and thoughtful young people they have blossomed into.

The dress code was open to interpretation and so, amongst others, we had Victorian gentlemen, one of literature's most famous jilted brides, Miss Havisham, as well as some spooky Victorian maids.

'Miss Havisham' won the 'Best Youth' prize
This mother and daughter combo won 'Spookiest Adult and Youth'
The Gent on the left won 'Best Handmade' for his gorgeous frock coat
Dressing the table

I always buy plenty of luxury Christmas crackers when they go down to 90% off in January, choosing neutral colours that can be customised for various events throughout the year.  For Halloween I re-tied them with black satin ribbon and attached a plastic spider (spray painted silver) to the front of each. 

We are lucky that one of our downstairs rooms is quite large, so we can set up tables going the entire length of the room seating thirty guests.  A sheer black satin chiffon tablecloth was a great backdrop to the mainly silver colour scheme and I had made enough candles to ensure that we didn't need any electric lighting.

If you squint carefully at the pictures you might be able to spot our Halloween tree, decorated cloches, wall sconces and beaded fabric bunting.  Next year I might even get some photos of the dressed shelves and apothecary cabinets!

Next stop Christmas!

Monday, 20 October 2014

How to Style Cheap Plastic Skeletons

Give your decorations a cool new look!

The quick tutorial I'm sharing with you today is not only the most straightforward of my Halloween DIYs - it's also one of my favourites.  I took inexpensive plastic decorations and instantly gave them a great new look, simply by the application of a little heat!


Take a look at these guys - Don't they look debonair in their casually cool poses!


They actually started out as cheap hanging decorations bought from my local supermarket, and are just the kind of thing you find in any pound or dollar store.  The little chap below has yet to be subjected to the magic;


Tutorial

So to place boring skeletons into far more interesting poses, simply heat with a hot air gun and gently manipulate into place.  The process doesn't even need any extra photos, it really is that easy!


 Go and turn up the heat!


Monday, 13 October 2014

From Plastic Clock to Perfect Cloche!

Halloween Cloche Tutorial


Our Halloween theme this year is 'Victorian Gothic' so, not surprisingly, bell jars, cloches, apothecary jars and other weird and wonderful curiosities all feature prominently.  


We've collected lots of great items but something exciting happens when 'treasures' are placed under glass, as they instantly become even more special!  Our displayed specimens also have authentic looking museum labels, which I created in a gorgeous copperplate script, adding to the Victorian curiosities feel.  


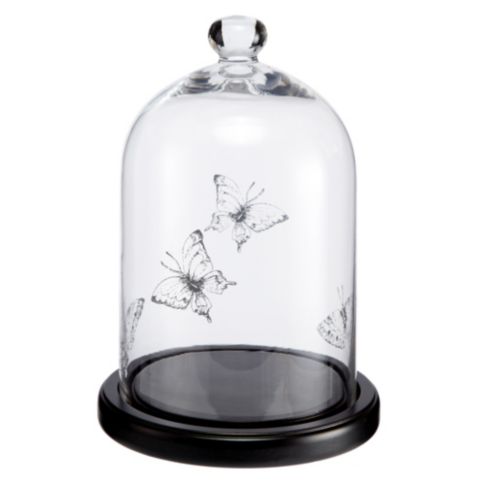
I love cloches and bell jars but found them shockingly expensive in the shops and I needed loads to transform our home into the abode of a slightly eccentric Victorian family, so I set about making my own.  I've already shared a tutorial on the smaller cloches, two of which you can see on either side of the top hat wearing skull.  They looked great, but I also wanted a few taller ones for our larger exhibits so when I found a (very) kitsch plastic dome clock at my local car boot fair I knew I had struck thrifting gold!  I subsequently found another six, paying between 50p and £1.00 for each, leading to my next Halloween Craft DIY;

Supplies
Thrifted dome clock
Small handle or knob
Acetate
Glue
Spray paint 
Dremel or drill


Firstly remove the clock itself as only the base and dome are needed.  Simply turn the clock over and unscrew, retaining the removed parts for a later project.    


The next step is to cover the holes left from the clock with a circle of acetate.  I upcycled mine from the clear window commonly found in packaging.  It needs to be the same size as the inner circle on the base.  Stick into place and then spray paint black.


If your dome is plastic rather than glass, drill a hole in the top and attach a small cabinet handle.  Mine was originally a rather bright brass colour so I sprayed it black to perfectly match the base.

That's it........


...from plastic clock to perfect cloche!


What will you display in yours?

Tuesday, 30 September 2014

Halloween DIY Printed Candles

Steampunk Inspired Tutorial


As well as my usual stitching, I'm also busy preparing for George's Halloween birthday party.  I kept my eyes open throughout the Summer car boot sale season for anything fitting our Victorian Gothic / Steampunk theme and now have lots of lovely upcycling projects to share over the next few weeks!

Firstly we want the house to be candlelit for the dinner but I was taken aback by the price of pillar candles in the shops, so they were a definite on my 'booting hit-list', (provided they cost 20p or less!)  Luckily I found plenty but, having been purchased secondhand, they were all different sizes and varying shades of white and cream. Some of them were also warped, presumably having being displayed on sunny windowsills, and all were rather grubby.   They were therefore in desperate need of a revamp and here are the results;


Steampunk Inspired Candles

I had already designed the party invitations and the artwork I used was also perfect for this project.  Having the same strong images running throughout creates unity, and a gives far more stylish and glamorous feel than you would expect from a thrifted event!


Easy DIY Printed Candle Tutorial

The candles were super easy to produce and cost mere pennies using materials you probably already have;

Supplies
Candles
Inkjet printer or ink-pad and stamps 
Tissue paper
Printer paper
Glue stick
Hairdryer
Scissors

An uninspiring grubby start!

The first step is to transfer your chosen images to the tissue paper.  If you have suitable Halloween stamps simply use these, otherwise a quick search of the internet will throw up hundreds of possibilities!

I was using printed images, so cut down a sheet of tissue paper to the same size as a regular sheet of copier paper.  My tissue was upcycled from gift packaging so I also gave it a quick press with my iron before securing it to the copier paper with a tiny dab of glue in each corner.  Both sheets were then feed thorough the printer in the usual manner.


Here they come!

Now cut out the printed images, trimming closely to the outlines.  Depending on the sharpness of your scissors it might be easier to achieve this whilst the tissue is still backed with the thicker printer paper.


The final stage is to fix the trimmed images to the candle fronts using the heat from your hairdryer.  Another quick dab of glue stick prevents an image from fluttering off in the warm air before it's fully fused!


As the hairdryer heats up the candle, the edges of the tissue paper magically disappear, sinking gently into the molten wax. In the above photo you can just make out the tissue edge around the skeleton's right hand and leg but in another second or two they'll be gone!

All finished


Halloween Gothic Candles 


I've made over thirty of them but here are just two making their debut in this year's 'Glamorous Gothic' mantel display.  


Happy Halloween!

Friday, 12 September 2014

Halloween Gothic Bell Jar Tutorial

Upcycled Plastic Bottle Display Cloche


The children only went back to school last week, but my thoughts have already been turning to Halloween.  We're holding George's Birthday Party on 31 October and the theme is 'Victorian Gothic'.  I have been busy crafting all manner of props including apothecary bottles, museum-style specimen jars and these 'Gothic Bell Jars'.


They came about as a result of this apple gift box, which I crafted from two upcycled plastic pop bottles.


I made quite a few and had the top bottle halves going spare, luckily a friend asked if she could have them to use as cloches on her allotment. I handed them over and she reported back that they were perfect for preventing pesky little bugs from devouring her crops!  This got me wondering if they would also make suitable display cloches.  So I went down to my local food store, armed with my half bottle, in search of something to use as a cheap base.  I trawled through the aisles trying every possible jar lid until I found the perfect fit.  I then needed a cloche handle, I bought some wooden cabinet handles from the local car boot sale and sprayed them black, but I wasn't really happy with the result.  Mr Larkin then reminded me about these cloches which he and the children kindly gave me for Mothering Sunday;


He pointed that they had clear glass handles and suggested that I use a large clear marble - Genius!  (He also noted that they cost £12 each and I was now making 'free' ones....)

I was delighted with the finished item so thought I should write a tutorial, as who wouldn't love to make their own gorgeous display cloche!

Gothic Bell Jar Tutorial

Materials

Empty two litre plastic soda pop bottle
Lid from ‘Hunger Breaks ~ Hot Pots’ microwave meal
Black card
Large clear marble

Equipment
Dremel tool or hacksaw
Strong multipurpose glue
WD40
Scissors or craft knife


Step One
Carefully remove the thread from empty plastic bottle, as in the picture below, using your Dremel or hacksaw.


Step Two
Using strong multipurpose glue, such as ‘E600’, stick the clear marble into the exposed bottle neck.

Step Three
Wipe off the expiry date on the bottle using nail polish remover or acetone.  Then remove the label, should any glue remain on the bottle simply rub with WD40.

Step Four
Carefully cut the bottle in half, using scissors or a craft knife, and discard the bottom piece (or make an apple gift box!).

Step Five
Cut a circle of black card to cover steam holes in the Hot Pot lid and stick into place.


Step Six
Now place your cloche cover on the black base, a two litre bottle fits the raised lip of the Hot Pot lid perfectly. However, if you can't find a 'Hot Pot' lid simply experiment with upturned saucers, dishes or other suitable items.  They even look fantastic just placed directly over your treasures!


I filled mine with various car boot and thrift shop finds - A quick spray of black and silver paint makes naff ornaments and cheap plastic animals look most gruesomely gothic!


Happy Halloween!